Sometimes the most fun upgrades are the ones that are cheap. Ok, scrap that. ALL of my favorite upgrades are the cheap ones (see my dining room light upgrade here). Today I've got part one in a two part series of under $25 kitchen upgrades to show you.
I've always loved kitchens with dark hardware (oil rubbed bronze) and light hardware alike (think satin nickel). But I figured the light-and-airy look I was searching for in my kitchen would be better served by sticking with the satin nickel hardware that was already there. When I bought the condo, my drawers and cabinets had the same tiny satin nickel knob hardware that is very common in kitchens. Here's a picture from one of my pre-purchase visits:
Notice the identical hardware on the drawers and cabinets. I have always admired kitchens with white cabinets (lucky me since my cabinets are already white!) and drawers with cup pulls. Here are some kitchens I love:
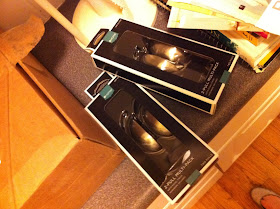
In order to attempt to emulate those looks, I bought three packs of these satin nickel cup pulls from Target. They look a lot better in person. At $6.99/ea they cost me a total of $20.97 plus tax. (You can also buy a six pack for $19.99 online here, but they did not have the value pack at my local Target store.) The brand on these cup pulls is Target Home. The quality is good, but not perfect. As you know if you've ever shopped for hardware, it is expensive. So these guys are good-looking and they will do the trick, but yours might have a few light scratches like mine did. I don't really care though, because it was difficult for me to find the right size cup pull for my teeny-tiny drawers at an affordable price. The cheapest cup pulls I found were about $4.99/ea and they weren't the right size. At $3.49/ea, I knew the Target cup pulls were the winners!
The most difficult part of installing the new drawer handles was measuring. Grrr. I had to go from one hole to two, so I drilled on either side of the old hole and left it the old hole since the cup pull will cover it up anyway. I would recommend making a paper pattern of the back of the cup pull and maybe even taping it over the front of the drawer to help show you where to make the holes. I did not have to remove the drawers in order to drill the new holes which saved a lot of time.
Mmm, love those nice gray laminate countertops. HAHA. Anyway. So here we are before our lovely cup pulls are installed...
And after! (Not to mention I cleaned the counters. That in itself probably made a bigger difference.)
I am happy with how they turned out. They're just the right size (not too big since the original hardware was quite small comparatively) and they work well. Oh, and if you're wondering why I didn't show you the other side of the kitchen, that's because there aren't any drawers over there, and cup pulls look really weird on cabinets.
Now the kitchen just needs paint, a new backsplash, new countertops, a deeper sink, a new faucet...
Next time I'll show you my other kitchen upgrade under $25!


No comments:
Post a Comment