It still had a slidy-bar thingy! And on the inside there was a glass container full of mercury. So here's what we upgraded to:
I picked this thermostat because it is programmable up to seven days and because the screen does not stay back-lit all of the time. The last house (a rental) that I lived in had a blue back-lit screen that never turned off. It used to keep me up when I was trying to sleep. This is also the model of choice because my boyfriend wanted a touch screen instead of buttons because it is more awesome that way. It cost about $68 dollars from Amazon, and the electric company offers a $50 rebate on digital thermostats so it ended up costing less than $20. Be sure to check with your electric company if you are making any energy saving upgrades because they may offer some form of reimbursement!
I was a little (very) nervous that installation would be troublesome. However, literally the most difficult part was separating the back installation plate from the front bulk of the thermostat so that we could affix it to the wall with screws (the new thermostat). It took FOREVER to figure out how. Basically you have to pull really hard in the right direction. I wish I knew more than that. Here's a breakdown of the installation process:
The FIRST STEP is to turn off the power to the breaker switch that the thermostat is powered by. Or you can turn off the power in your entire residence to be on the safe side. Just be careful and know that your fridge or freezer might defrost.
The old thermostat had three main parts, the back plate that connected to the wall, a second plate that connected to that first plate and held the mercury, and the front cover. We removed the front cover and the second plate.
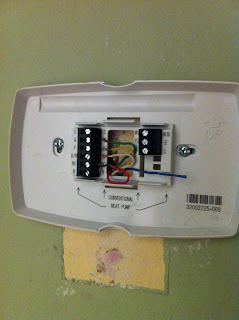
This is what was left over when the first two plates were removed. At this point you'll want to label each wire so you can remember where to attach it to on the new thermostat. The wires should have little letters next to them like 'w' or 'x'.
Making sure the power was off, we used a flat head screwdriver to remove the final back plate from the wall. (Notice that this is before we painted the walls in the living room/hallway
Here's the back plate now removed from the wall and being held next to what was left sticking out of the wall (wires in various colors). At this step you can clearly see the little pieces of tape that labeled the wires so we could remember which wire belonged to which function.
Just admiring how good the new thermostat will look!
Use a level to make sure the thermostat will be even on the wall.
The next step is to drill new holes for your new thermostat's back plate and install. You can also see where I spackled a bit in the old thermostat's holes so I could paint over it well later (the pinkish-purple circle). Now you can attach the wires!
Now all that's left is to snap that puppy on...
And turn on the power! (Whew, it was 83 degrees in there.)
It glows in the dark! (And it's still 83 degrees.) And yes, I keep my thermostat at 78 degrees. But that was for September - not August!
Overall it was not that bad. I would say that most people could complete this home improvement project without too much trouble. In case you're curious, we installed the new thermostat probably five days into our first electric bill, so we don't have any idea as to how much money it saved. But the electric bill for September was only $13.


Enjoying your home improvements. This is a very helpful, detailed post! At least it would be helpful to someone wanting to replace their thermostat....
ReplyDeleteOctober cookies coming, probably next week. I just keep getting busier. Not sure how/why.
love you - mom
p.s. Can you write an off-topic post about how to post a comment as yourself? Somehow I'm having trouble with that ;-)